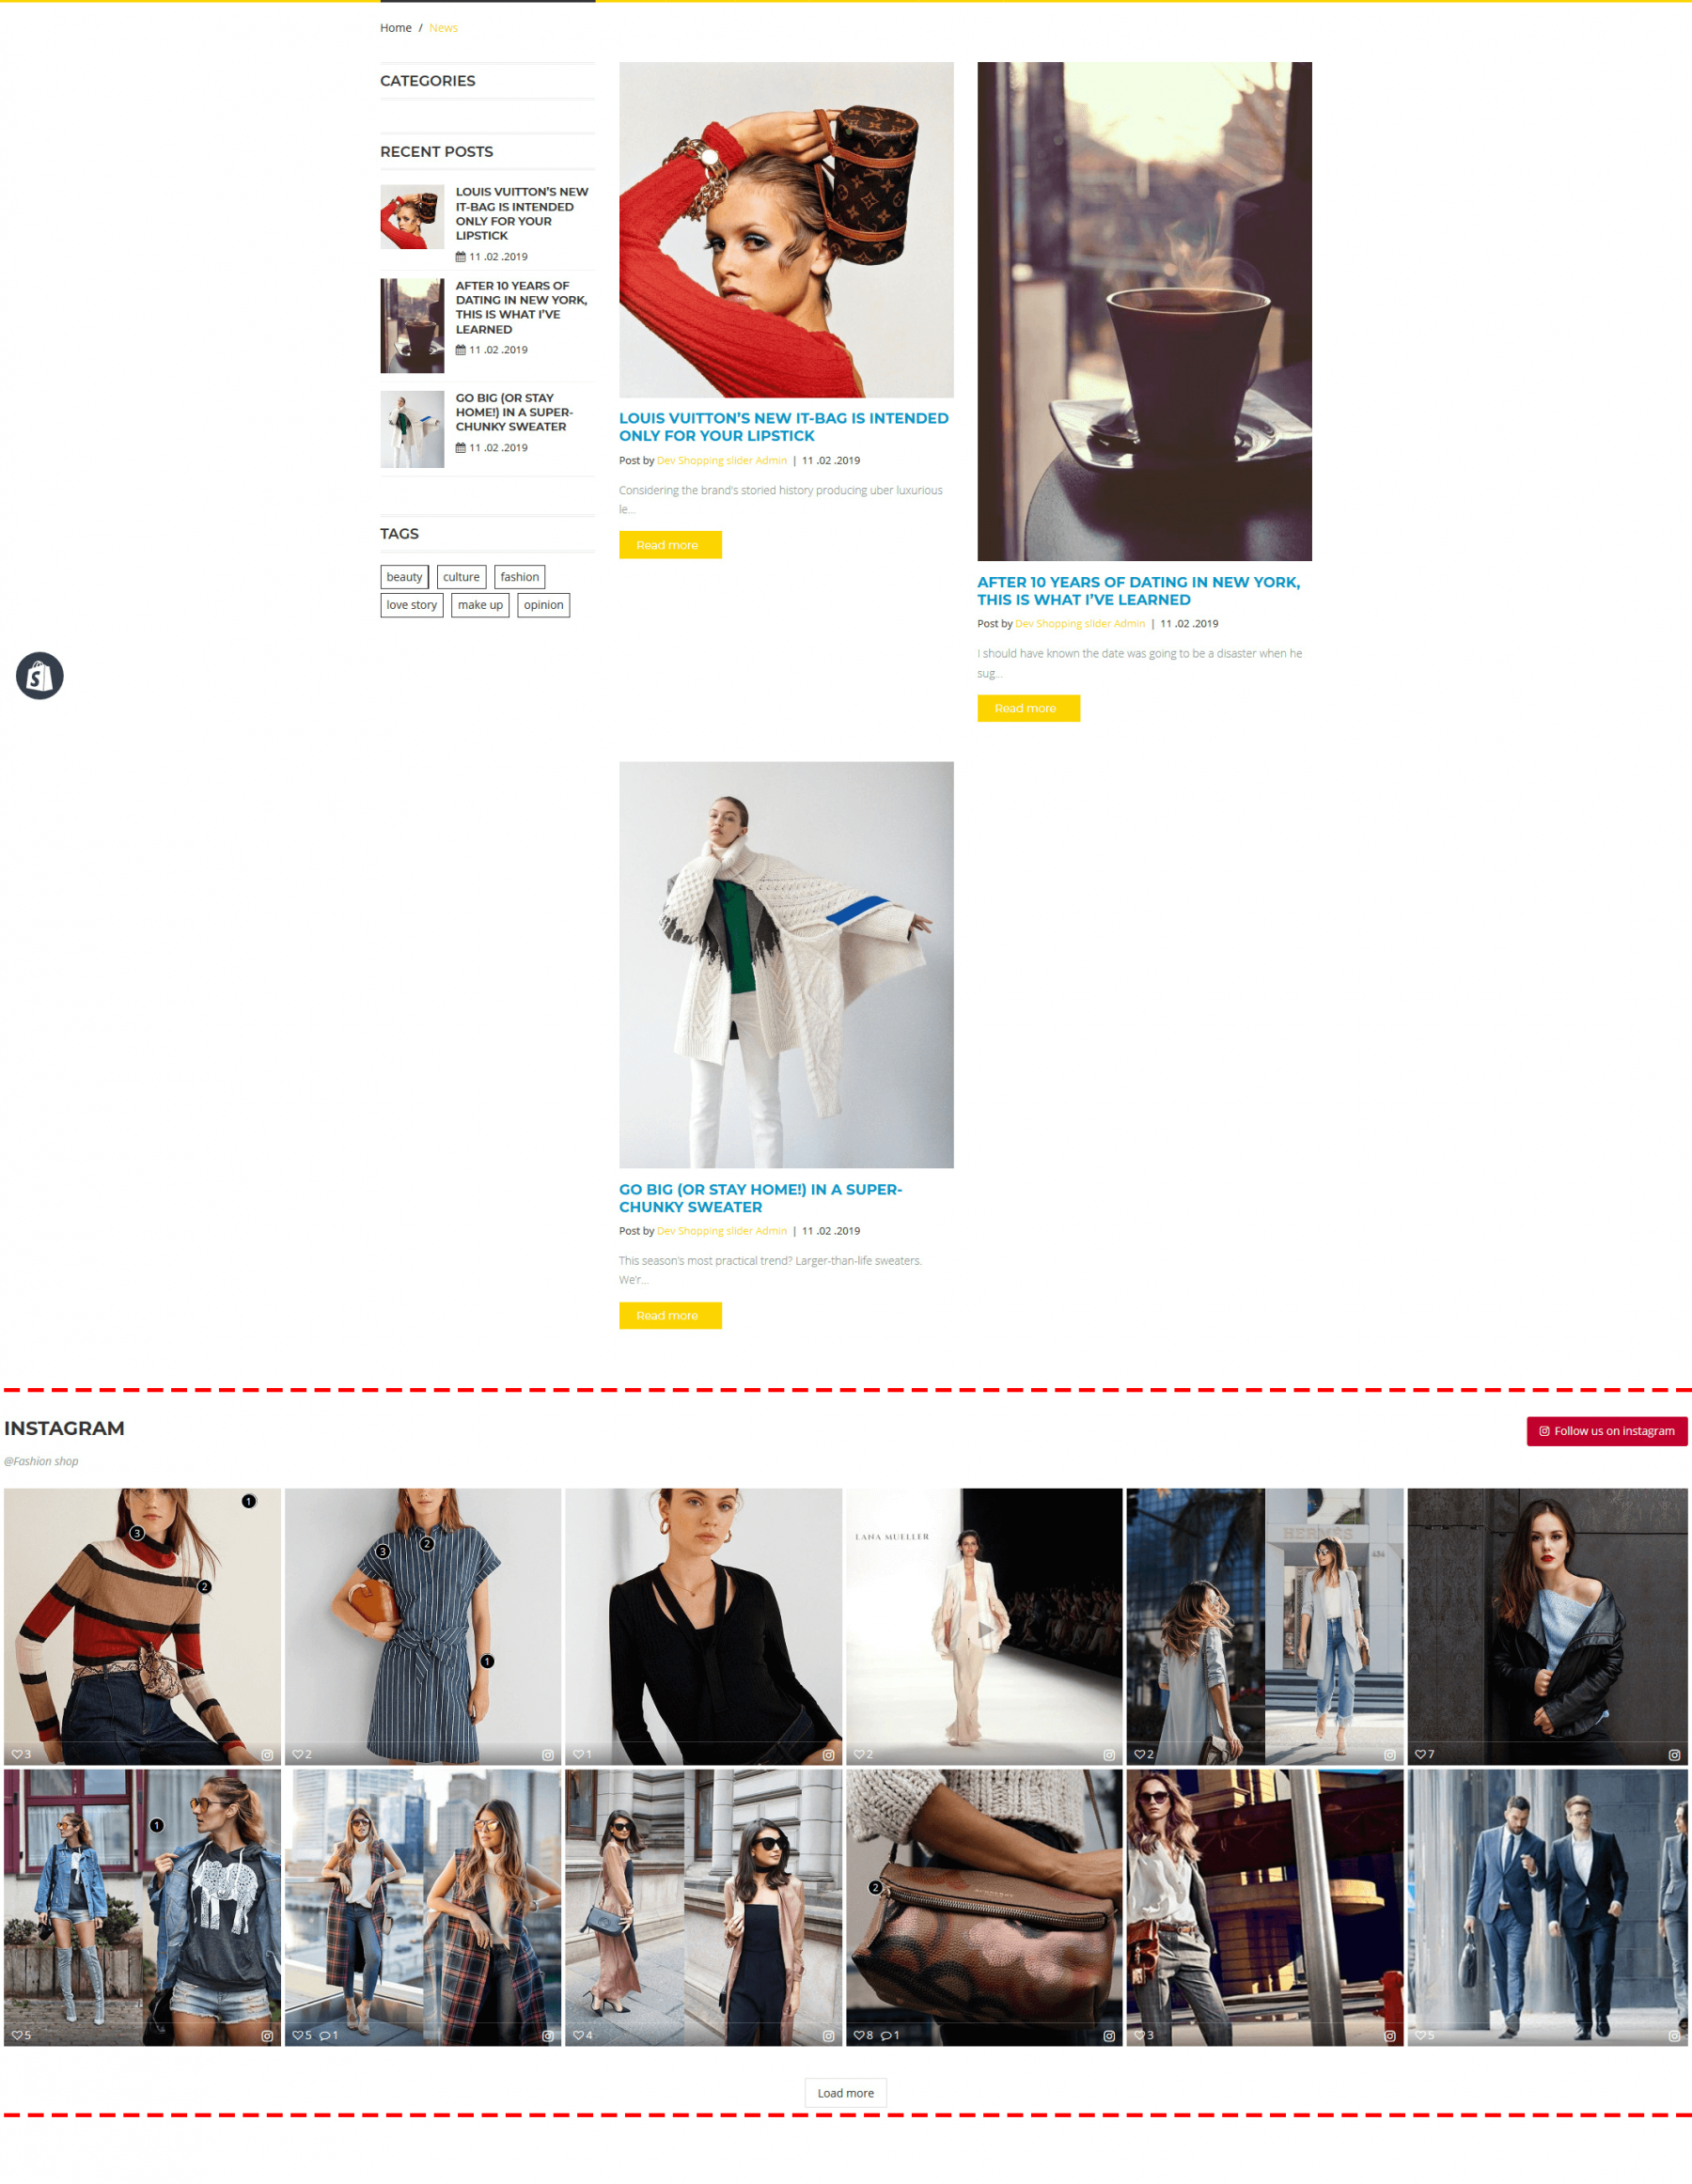
Instagram Shopping & Feed is a simple but effective solution to showcase all your Instagram photos and videos on your Shopify store. This app gives your storefront a stylist and modern Instagram section for people to explore your best products.
In order to display Instagram photos/videos to your online store, Instagram Shopping & Feed offers you 2 selections: Instagram section and embedded code.
By default, this app will create an Instagram section on your online store homepage:

But if you want to display the photos/videos to a position on your online store but the position is not supported by the Instagram section, Embedded code is useful for you.
On this section, we will guide you how to customize Instagram section and how to customize and use embedded code on your Shopify online store.
A. Customize Instagram section
Navigate to Online store > Themes section. Click on "Customize" button to open the settings editor page where you can change the appearance and content of the theme

Go to the Sections tab > Select "Instagram" section. You will find the following options to customize Instagram section:
General settings
a. You can adjust Instagram section title and select which type of photos/videos to display.

Note: Display “Featured only” photos/videos and display “tagged with products only” photos/videos options are available after you marking featured photos/videos and tagging products onto photos/videos.
To read more about how to mark featured photos/videos, please navigate to “Featured photos/videos” section.
To read more about how to tag products onto photos/videos, please navigate to “Shopping feature” section.
b. Layout type: Instagram Shopping & Feed app supports 2 layout types for Instagram section: grid and carousel slider.

Grid layout settings: you can set up number of initial photos displayed and maximum number of photos displayed. You can also display or hide “Load more” button.
.png)
By default, when you select grid layout type, Instagram section on mobile devices will be displayed on grid layout. If you enable “Force carousel slider on mobile” option, Instagram section on mobile devices will be displayed on carousel slider layout even though layout type on desktop is still grid.
.png)
Carousel slider layout settings: you can set up number of photos displayed, enable/disable auto-play carousel slider, set up slider playing speed (in millisecond) and enable/disable infinite loop slider.
.png)
c. Photo filter effects: Instagram Shopping & Feed supports 9 beautiful photo filter effects to make your Instagram photos/videos more attractive. You may select preferred filter effect for initial photos and when mouse pointer hovers over photos.

Here is an example:

d. Redirect to shopping cart page when click on 'Add to cart' button
When customers view a photo/video and want to purchase any product, they can click on “Add to cart” button to add that product to shopping cart. You may redirect customers to shopping cart page or keep them staying on the current page.

e. Display 'Shop now' & 'View photo/video' button
If you enable this option, when you hover mouse pointer over a photo/video a shopping cart button will appear. You can click on this button to open Instagram photo slider using Fancybox 3.

f. Display Instagram comments
If you enable this option, Instagram Shopping & Feed will display all comments posted on Instagram related to your photo/video.

Display settings
You can modify the following settings:
- Number of photos per row on desktop
- Number of photos per row on tablet
- Number of photos per row on mobile
- Section padding (px): the spacing value between Instagram section and other sections
- Photo spacing (px): the spacing value between each photo on Instagram section
.png)
Follow button settings
You can modify “Follow” button label and its design, such as button background color, background color when mouse pointer hover, button border color, etc.

Shopping cart button settings
You can change the button title of shopping cart button on specific cases and change the button design.

Remember to click "Save" to apply your settings.
B. Display Instagram section anywhere you want with embedded code
In order to display Instagram photos/videos to your online store, normally you should use Instagram section. In case you want to display the photos/videos to a position on your online store but the position is not supported by the Instagram section, Embedded code is useful for you.
Just select your preferred settings in the form on "Embedded code generator" tab then click "Generate" button to get embedded code. Copy and paste the embedded code to blog page, product description, template .liquid files, etc. where you want to display Instagram photos/videos.


How to use your embedded code
After getting the embed code for Instagram section as instructed above, you can paste it into any template .liquid file you want to display Instagram section. Here are some examples about using embed code on product description area, on a .liquid file and a blog post page.
Embed code on product description area
STEP 1: On your Shopify admin, navigate to Products page. Click on a product you want to display Instagram section on product description area.

STEP 2: On "Description" field, click on "Show HTML" button. Paste the embed code on "Description" field. Click Save.


STEP 3: And we're done! Open your product detail page and see the change!

To remove Instagram section out of product description area, just delete embed code on "Description" field.
Embed code on a .liquid file
STEP 1: Navigate to Online store > Themes page. Click on Actions dropdown menu. Select Edit code.
STEP 2: Scroll down and select blog.liquid file. Paste the embed code. Click Save.

STEP 3: Open your blog page and see the change.

Similar to blog page, you can add Instagram section to any place you prefer by inserting embed code to the respective .liquid file. If you want to remove Instagram section out of your web page, just delete the embed code on .liquid file.
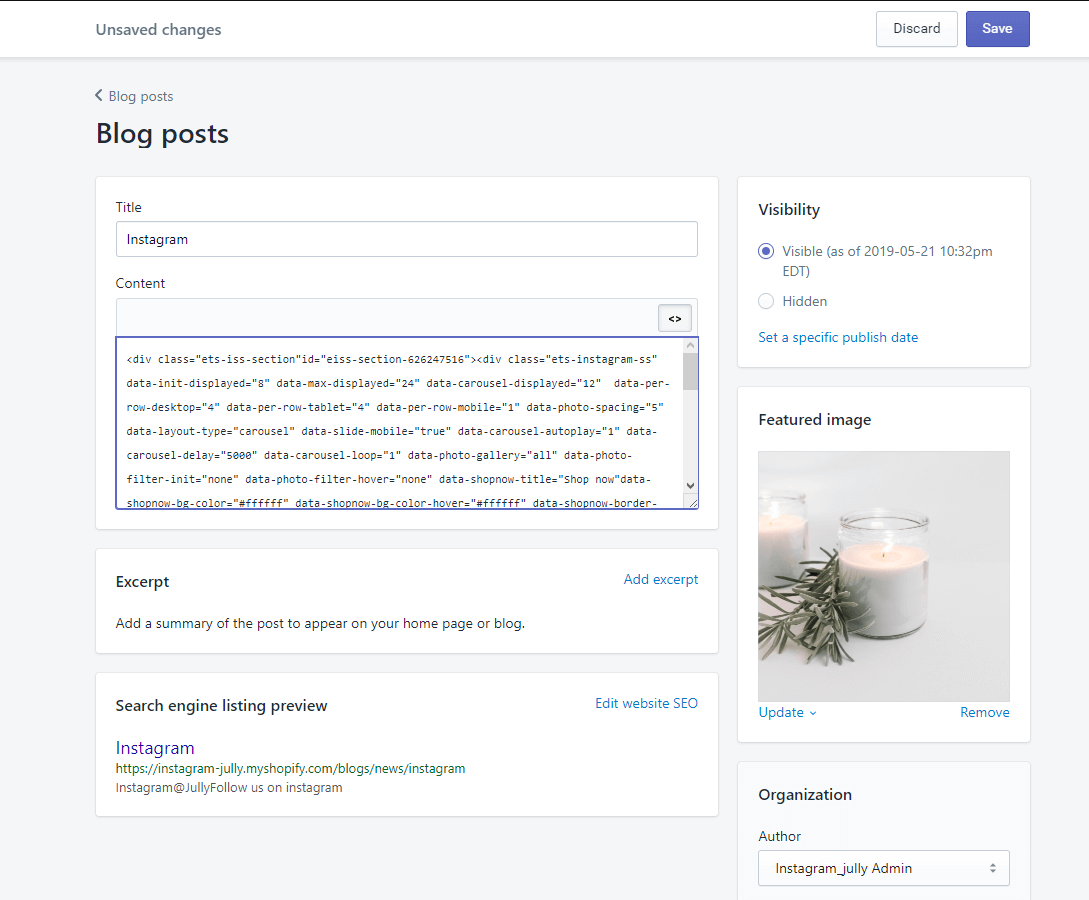
Embedded code on a blog post page
STEP 1: Navigate to Online Store > Blog posts > Create blog post
STEP 2: Enter blog post title, upload featured image, etc.
STEP 3: Click on "Show HTML" button above "Content" field. Paste embedded code into "Content" field.

STEP 4: Set your blog post visibility to "Visible". Click "Save" to publish your post.
Now you have a separate page to showcase all your Instagram photos/videos.